
***Update to this Tutorial
I created this embossed desk years ago when I was a retailer for Debi's Design Diary. Although I stand by all the methods used I have since created my own clay paint, Tanglewood Sue's Hues and I have created my own paint thickener, Sue's Puddin' Potion.
In today's BLOG, I share the story of how a challenging piece of furniture gave birth to a whole new design style.
If I were to create this look again I would substitute these colors from my line
and
For the metallic wax I would now use my Tanglewood Sue-per shifting wax Dragon Empress.
I sure hope you give it a try!
Watch the Full Video Tutorial Here!
The hardest part is starting!!
Table of content
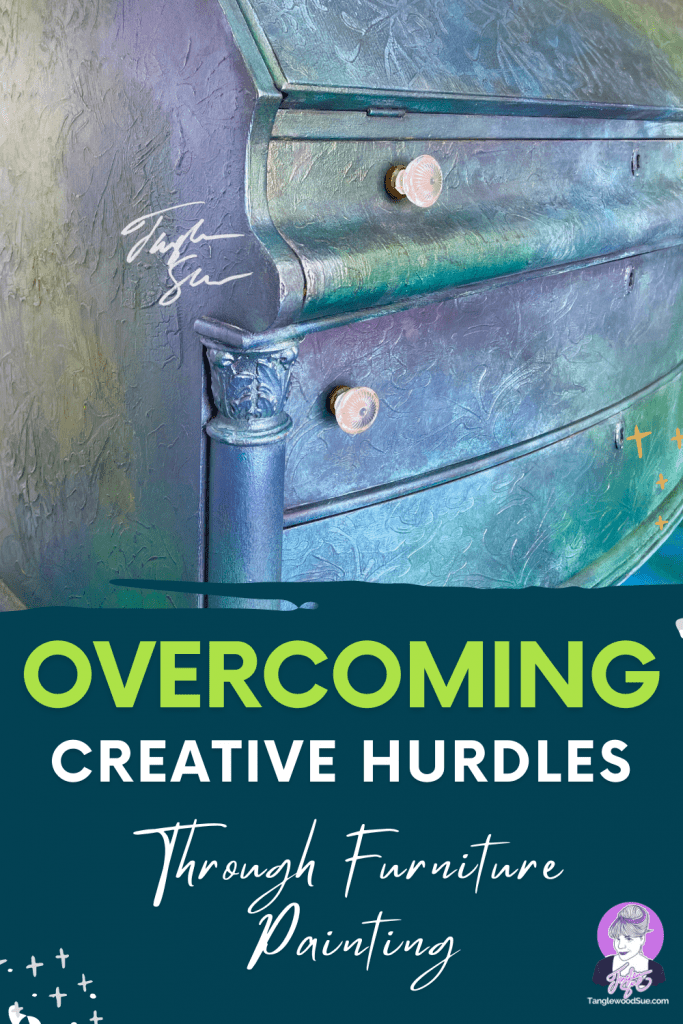
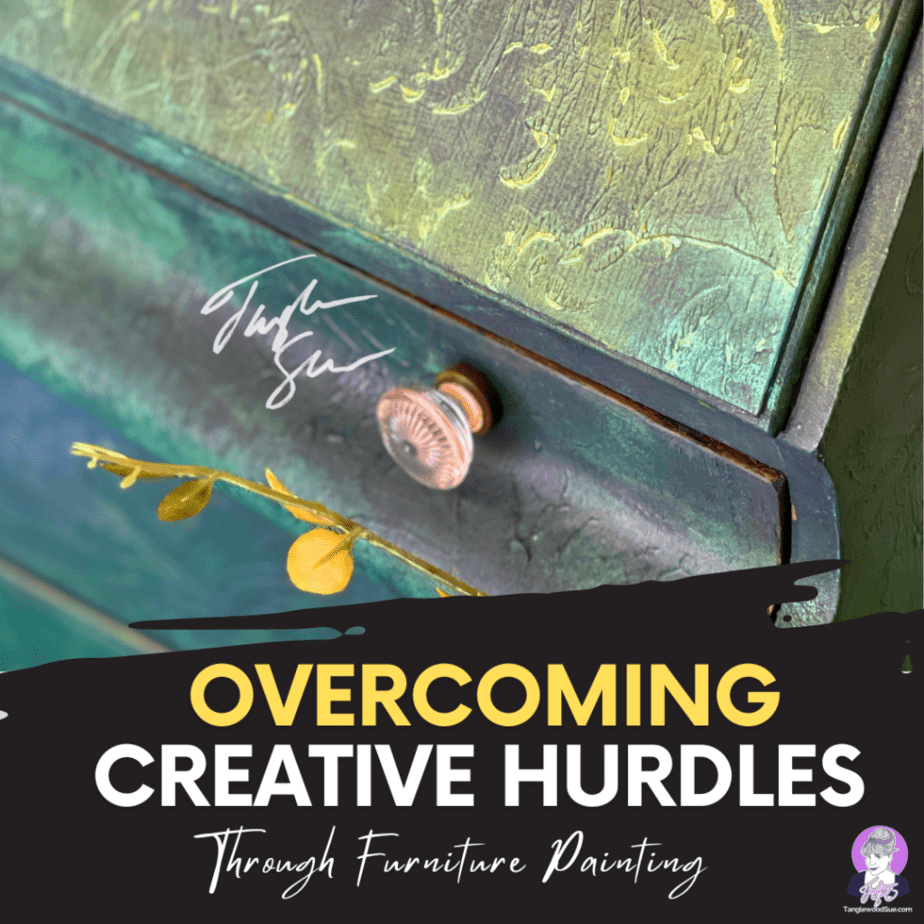
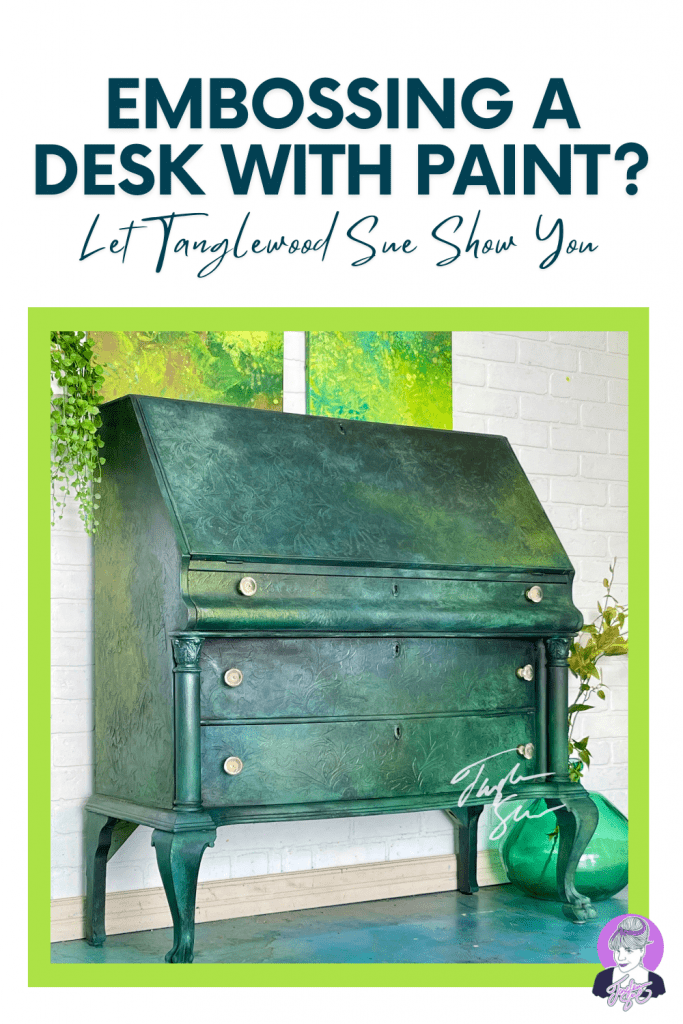
The story of My Controversial Emerald Embossed Desk
Do you want to add some extra flair to your furniture Painting? With Debis Design Diary Paint frosting, you can create an embossed pattern on any surface! In this blog post, we will show you how to do furniture painting. It's a simple process that anyone can do with a little bit of practice. So get ready to transform your furniture with Debis Design Diary Paint frosting! (all supplies are included at the bottom of this post)
Now on to the story
We all have creative anxiety. Will, what we have in our head even remotely resemble what we are capable of creating? Probably not. Especially if you are a beginner with excellent taste.
People ask what my secret to overcoming these hurdles is, and I tell them this: I don't hold the end result as tightly as I once did. Instead of a clear image in my head of what I want to create, it's more like a blurry blob that may or may not even relate to my finished creation. Sometimes I have to hold the vision more tightly if I am creating a custom design but other than that, I have stopped trying to sharpen my focus. I embrace the blurry and then begin.
This is the story of how I straddled my "blob" of an idea on one hand while actually aiming to please a custom client who had not even committed to the piece, on the other.
Here is where this furniture painting story began
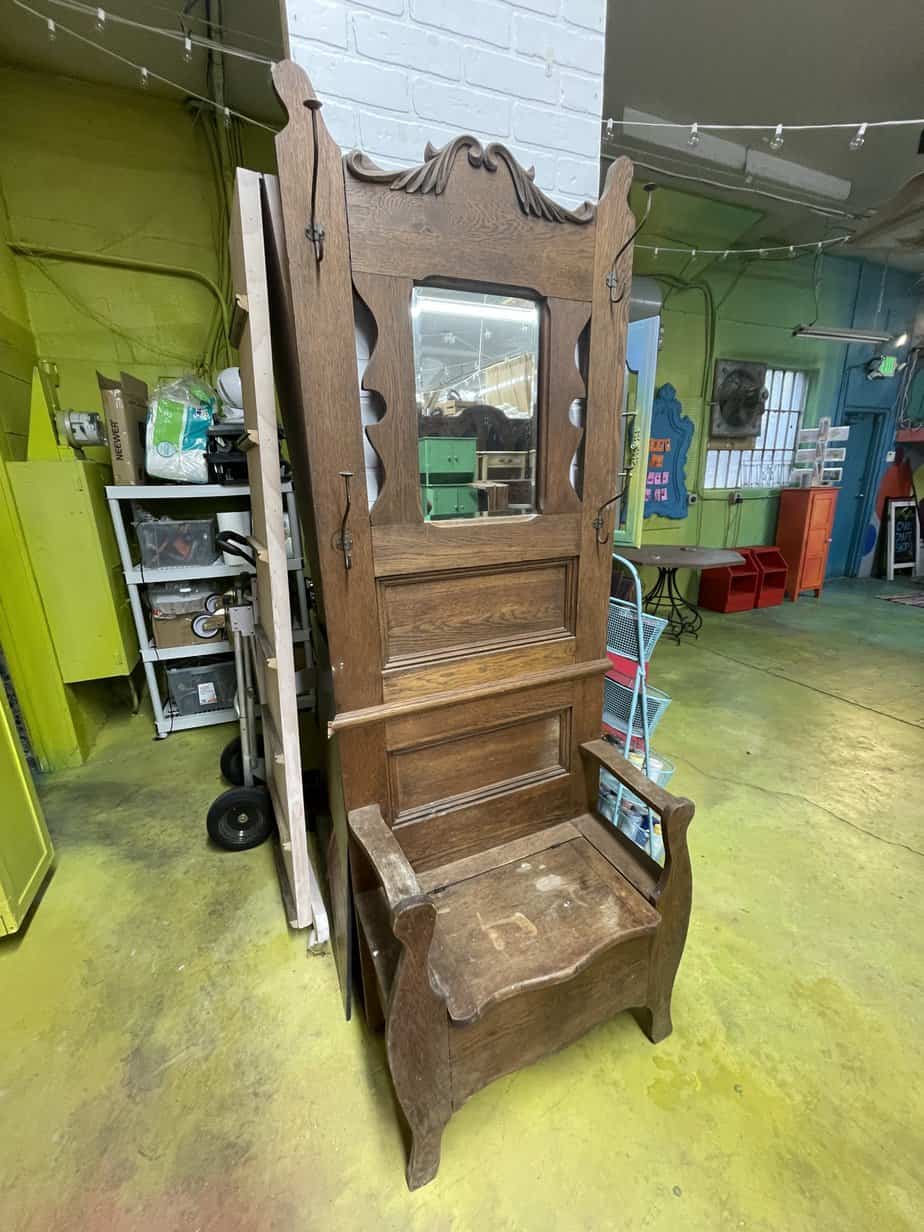
I had a new client who was super pumped to get a few Tanglewood Sue creations into her home decor. She wanted me to makeover an armoire, a hall tree, and a dresser.
The Desk Drama Begins
The day all the pieces were set to arrive I get a call. (I always get a damn call...) Anyway, this one was to explain that the large armoire I was to makeover would not even fit down the stairs! SO instead my client was sending over a desk. No worries.
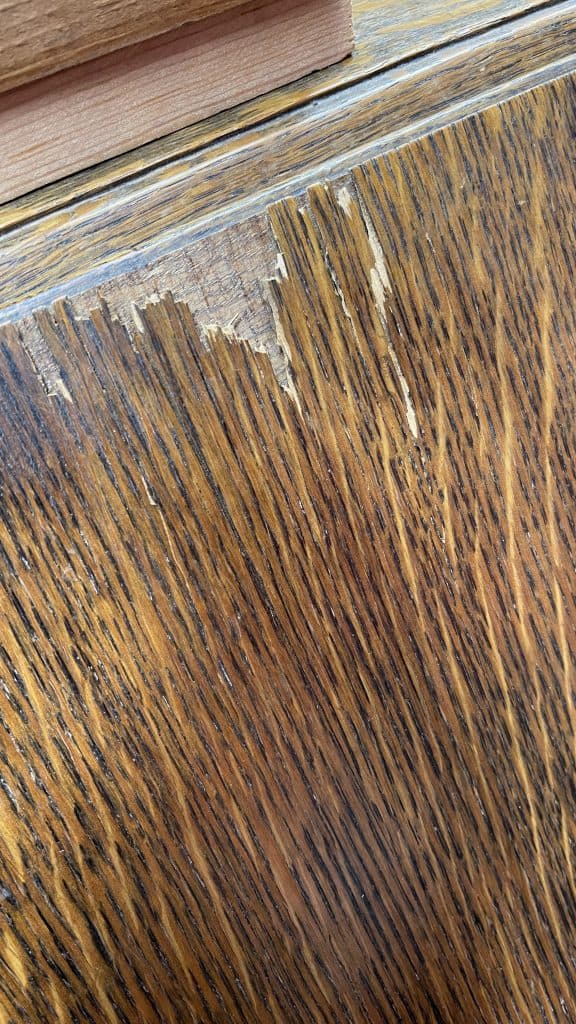
That is until I actually saw the desk! It had been painted in some kind of oil paint that had been thickened to create a texture I would never be able to remove.
I'm so sorry that I did not get you a picture.
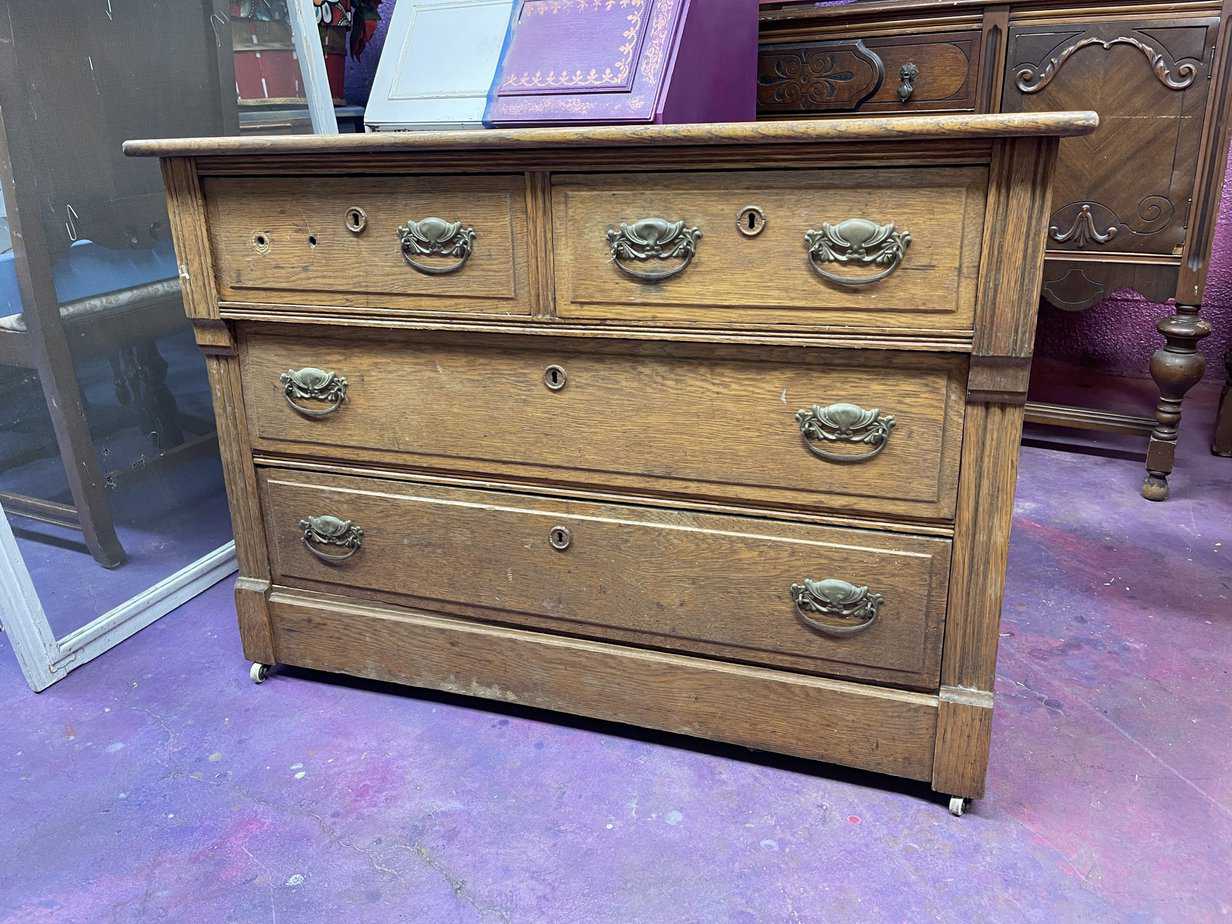
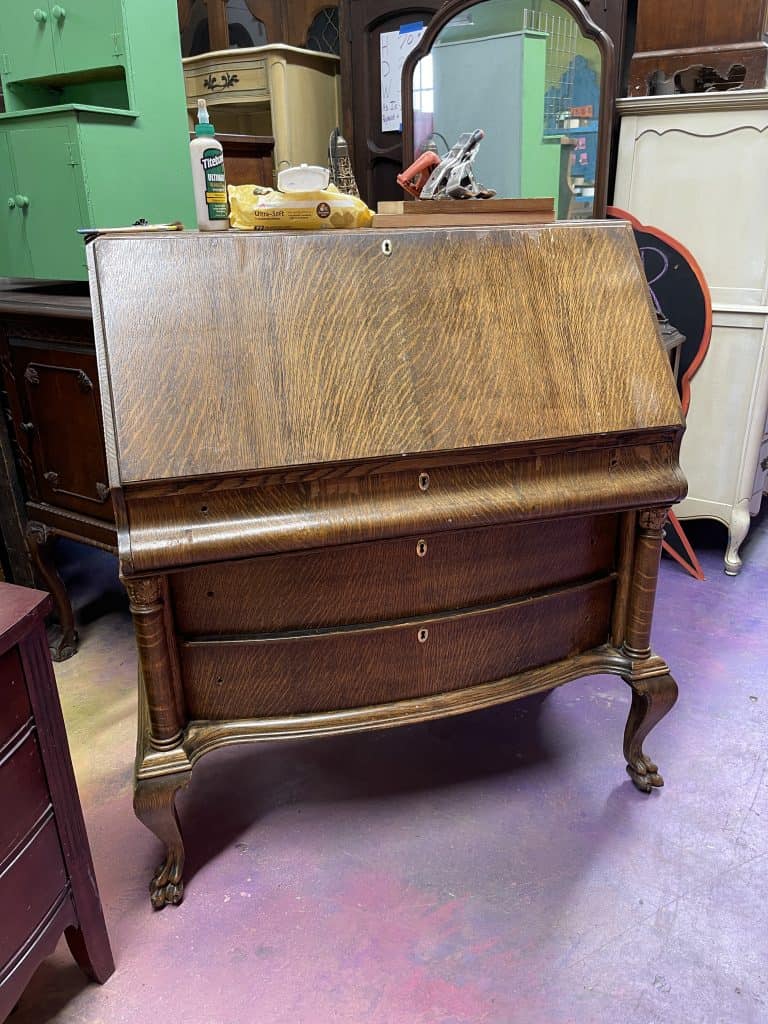
I went ahead and finished her dresser and Hall tree (she loved them) but I explained that the desk was a no-go. I instead presented her with an oak desk that was also in need of some love (but not as much as hers) and asked would it work for her needs?
Here is the Desk I proposed to her
Now we had already decided on a color scheme for the armoire that we planned to apply to this desk and I was very excited about it. It was to be blacks and greens, a combo I had never attempted.
She was unsure so she just agreed to the two pieces and we scheduled a pickup for her.
I still had the dream of those blacks and greens floating in my head though.
Mind you, it was a blob of an idea. Nothing fully formed and now I had no pressure to work within any confines at all.
This is my first tip for unleashing your creativity. Take the Pressure Off!
Some of us work well under pressure. Some of us don't. This may work for you, or you may be someone who needs the exact opposite, but you won't know till we test it right?
I am NOT that Artist
There are some furniture painters out there who adorn already beautiful furniture pieces with their painterly talent
I am not that artist!
The pieces I procure are basically sad little orphans that nobody wants anymore. They may have once been stunning but they have been neglected or abandoned and now they are my canvas.
As I mentioned in my last post,many will try to shame me for the work that I do, but I know better. I know that the very person who trolls me on social media for painting over wood would never put their money where their mouth is.
They have never taken the time to restore a damaged antique or vacuumed out cobwebs (or worse) from furniture excavated from a trash pile. When you get furniture like I do, the finish is often a wreck. It no longer can be restored with a wipe of feed and seed, no those days have passed us by and even a yummy colored coat of paint may not do the trick.
WHy? because the dents and scratches are just too many to count. Now there are some who wear their orbital sander on their hip as if they are a gunslinger in the old west. Ready to draw at any moment and kick up a tornado of dust just to get those scratched layers to disappear.
Again. I am not that artist.
I don't like going backwards. I am not a refinished and a bringer back of styles. There are plenty of old men in basements doing this all day long instead of entertaining their wives. They are abundant on this planet and they will mansplain you to the death if you even suggest sanding against the grain.
Let them have their way. Let them spend endless days matching the exact stain to the original finish. They have time! They are not trying to make a living. They are escaping their wives who want them to go with them to Target! I on the other hand,
I want to create something new, and bold, and unexpected. Even I don't know where my pieces will end up! As a matter of fact that is exactly the case for this desk. I had no idea where this would go but I'm really glad I took the journey.
Let's get started!
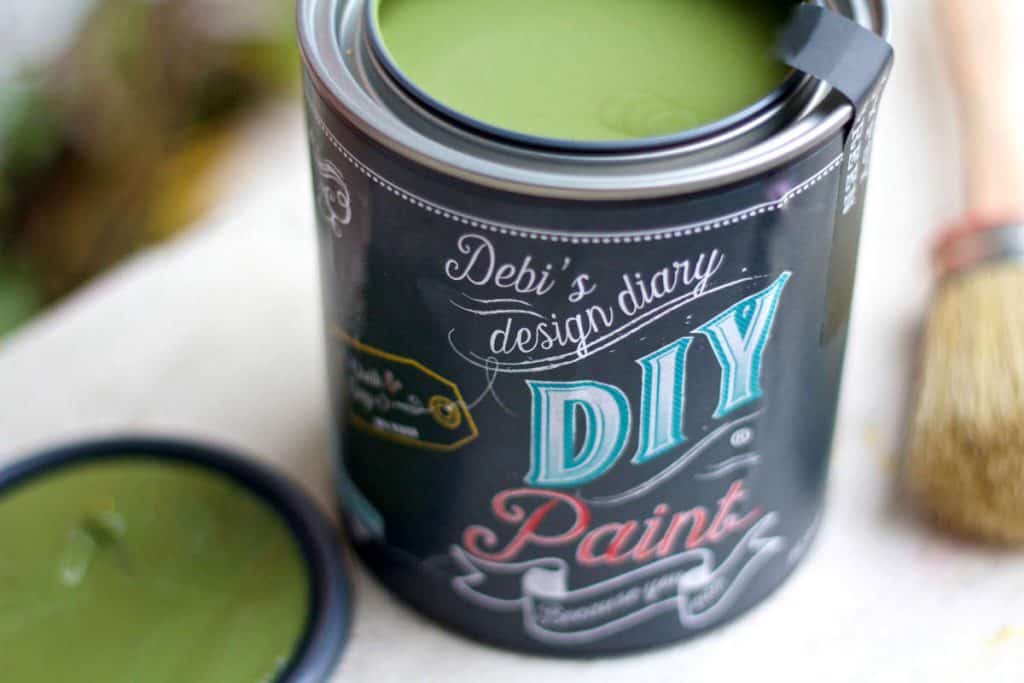
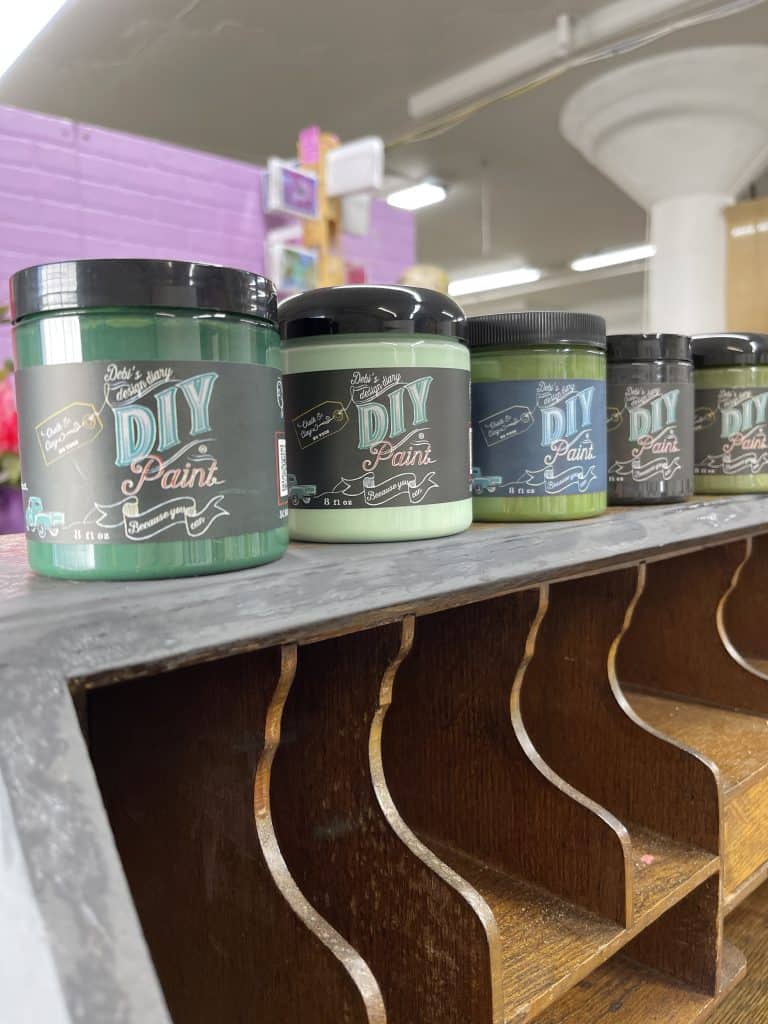
I grabbed that desk and an assortment of black and green paints. I chose to use Debis Design Diary Paints for this makeover. However, I don't know why I started here but I'm sure glad that I did.
I first needed to repair this desk as it had quite a lot of veneer damage. I chronicled the entire process on TikTok including accidentally gluing blocks of wood to the desk!
This is how I try to fix furniture that has been damaged. It's not perfect, but it gets the job done.
This is one of my favorite things to do, furniture surgery 😎
Once I finally got all the veneer to settle down I had quite a lot of places that needed wood filler. Since I knew that I needed to paint this piece I applied the filler pretty liberally and then sanded back.
Adding the paint!
Now that I had the veneer in place and all the dents and scrapes filled in it was finally time to apply the Debis Design Diary Little Black Dress
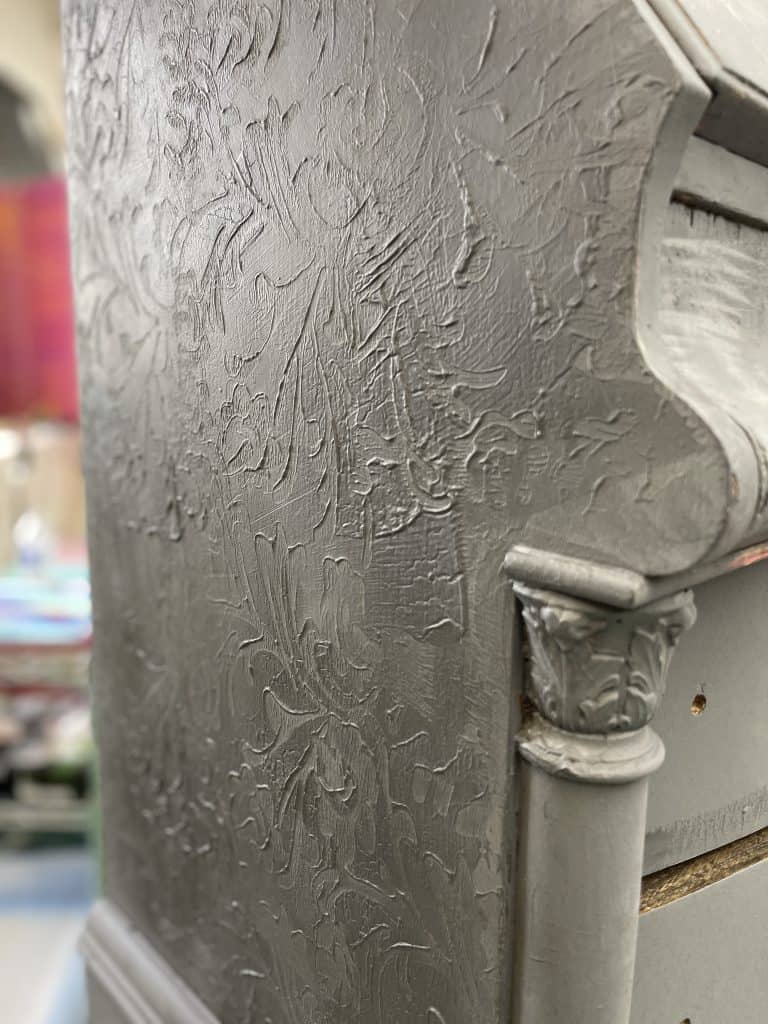
Once I put on the first coat of Little Black Dress I knew we had an issue. I had done my best to repair all the wood but there were quite a lot of imperfections coming through the finish.
I knew I needed some texture to camouflage my less-than-perfect repair job.
Paint Frosting, It is time for your debut my friend!
Since I was using Debis DIY paints it occurred to me (finally!) that there was a new product that I had not tried, Paint Frosting!
First Let's Learn how to make paint frosting for embossing. It's super simple, and you can put it straight on the desk 🗒
Paint Frosting a mixative for the clay paint that actually thickens it up, way up! Almost like a pudding.
I figured if I thickened the paint I could apply some kind of texture that would hide any bumps in the finish.
I somewhat followed the instructions and it totally worked. Because I used black it really did look like some kind of rich dark pudding!
I started applying it with anything I could find.
Try using unconventional tools
Here's how the base layer turned out
1 comment
How do you clean the brushes after using the waxes??