
Paint Pouring With Daydream Apothecary Paint - Pour Your Heart Out
Before I get into the pour painting process, here's a little backstory about why I decided to try paint pouring with Daydream Apothecary Paints.
The Story Behind This Daydream Apothecary Paint Pouring Project:
If you've got a great idea brewing in your head, it can be tempting to go big and try to make it happen all at once. But sometimes, it's worth taking things slow and starting small. That way, you can work out the kinks and perfect your idea before going all-in.
On the other hand, you may have that great idea and keep procrastinating (sound familiar) because you are too scared of screwing it up to even get started.
I've experienced both and I have learned when I need to hold myself back from jumping in too fast and when I'm stalling.
Both of these situations can be easily solved by starting a little smaller. If that big armoire you've decided to try paint blending on for the first time is freaking you out. Maybe you should listen and do a little practice first.
If on the other hand you've blended the same paint colors on 10 small pieces already and you are still scared to paint the huge armoire, this is me pushing you off the cliff. Now, you are ready-stop stalling-grab your brush!
So How Do You Start Small?
When you are starting out, a canvas is perfect. Big or small really doesn't matter. This is your practice. Just make sure it's good quality. I often sell my practice pieces and you may want to as well.
https://youtu.be/uGEjTY586QI
The idea stuck in my head was doing paint pouring on a dresser with Daydream Apothecary Paints.
I've done plenty of paint pours and even on furniture, but I had not auditioned Daydream Apothecary Paint. All paints, especially chalk and clay paints have a different balance in their ingredients. What works with one paint line may not work with another. I have paint poured many cool pieces with Miss Lillian's No Wax Chock paint with great success, but my attempts to pour with Debi's Design Diary Paint were less than successful. Paint pouring means using a lot of paint and letting it dry slowly. Debi's DIY cracked when it dried because it did not have the same level of elasticity that Miss Lillian's had.
I had no idea where Daydream Apothecary would fall and I didn't want to test it on an actual dresser before it passed a few tests.
- Would the colors swirl or become mush?
- Could I create cells in the paint?
- Would the paint dry nicely or would it crack?
I decided to start with a canvas and really push this paint to the limit. At this point, I have nothing to lose but a small amount of paint and my time. This was gonna be fun no matter what so nothing could actually be wasted.
With paint pouring, a great place to start is with chalk paint. It's non-toxic and dries quickly meaning you can get in and out without spending too much time on it.
Let's Start Pour Painting.
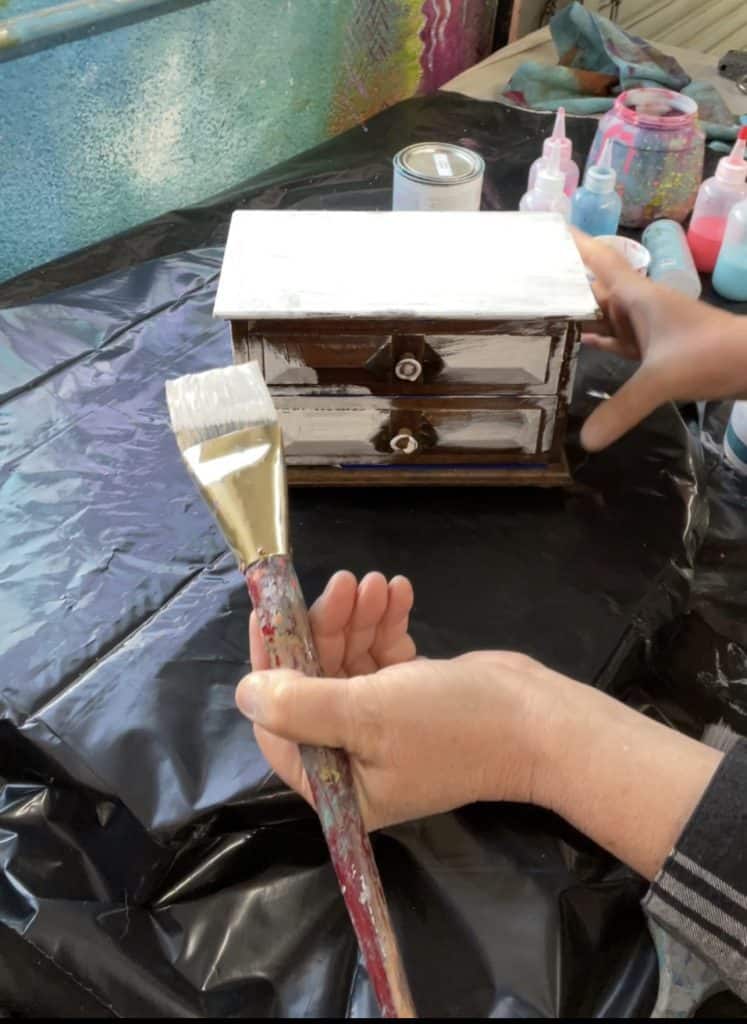
Step 1: Choose a small to medium canvas and make sure its primed for paint. Use a paint primer or better yet, some white gesso.
Step 2. Choose at least 3 colors. For this pour, I used Sea La Vie, La La Love ya, and Saltwater. I chose these Daydream Apothecary Paint colors because they included a light color, a dark color, a warm color and a cool color, and of course-a neon color!
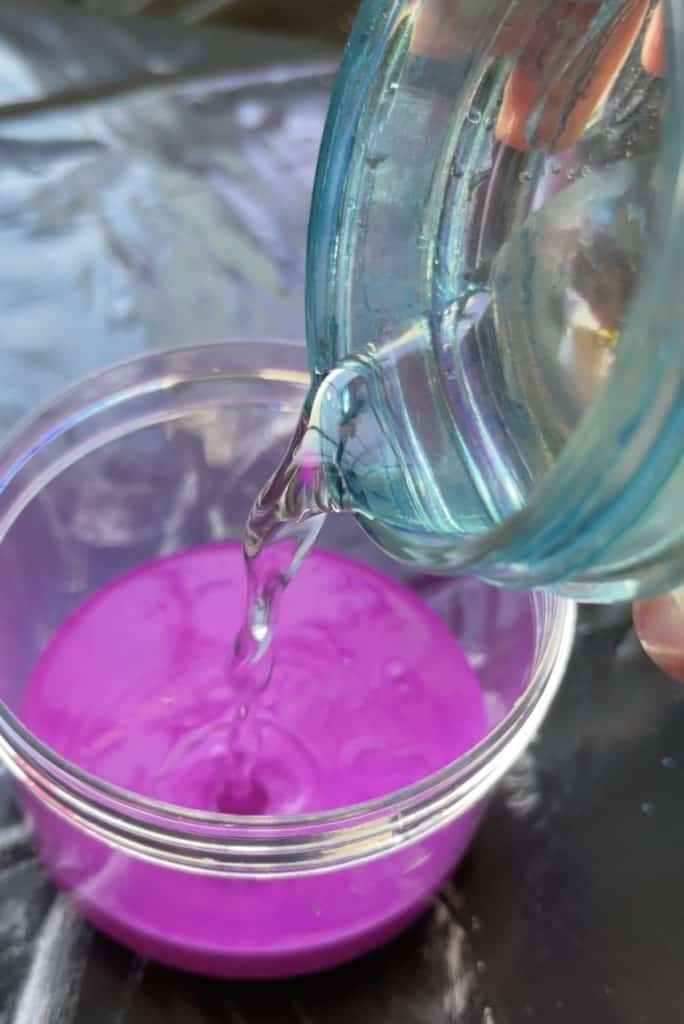
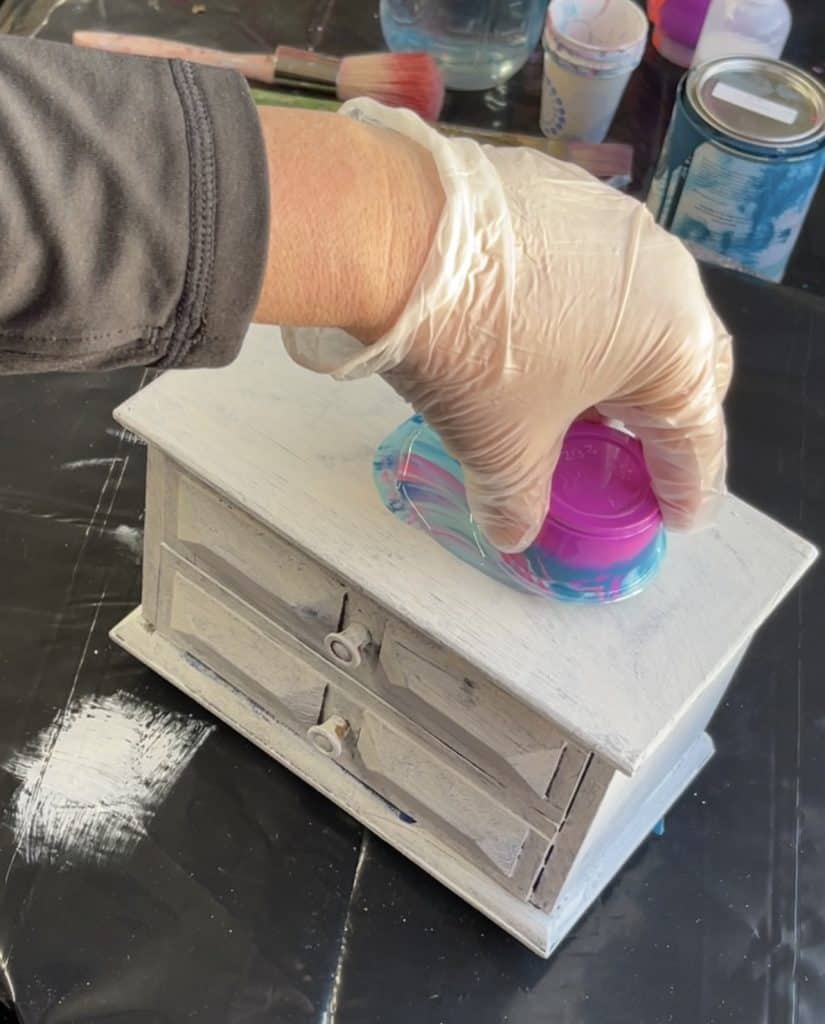
Step 3: Next, pour your paint into small cups and dilute with about 1 part water to 4 parts paint. You'll need to test this as every paint is different as well as every color. You want your paint to be thin but not runny.
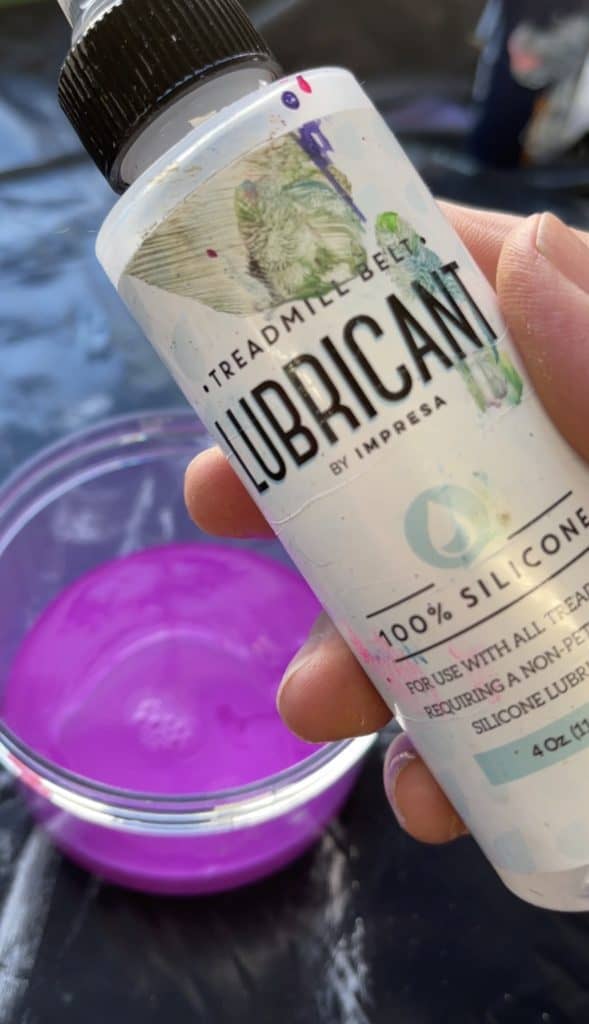
Step 4: (optional) You can also add two to three drops of treadmill lubricant into each cup and stir. This is what gives you those super cool cells.
Here is a link to my amazon list of paint pour supplies that I recommend:
MY Amazon Paint Pouring Favorites
Step 5: Layer your paints one on top of the other. No need to mix them.
Step 6: Then it's time for the fun part. Pour it baby. Flip it. Ribbon it. Splatter it. Whatever way you do it that makes you smile.
Step 7: Start stretching your pour to reach all the edges of your canvas. You can add more paint if you didn't fill your cup up enough this time and or the square footage.
Step 8. If you have a blower of some kind, even a straw, you can start to really move the paints around and get those lovely cells.
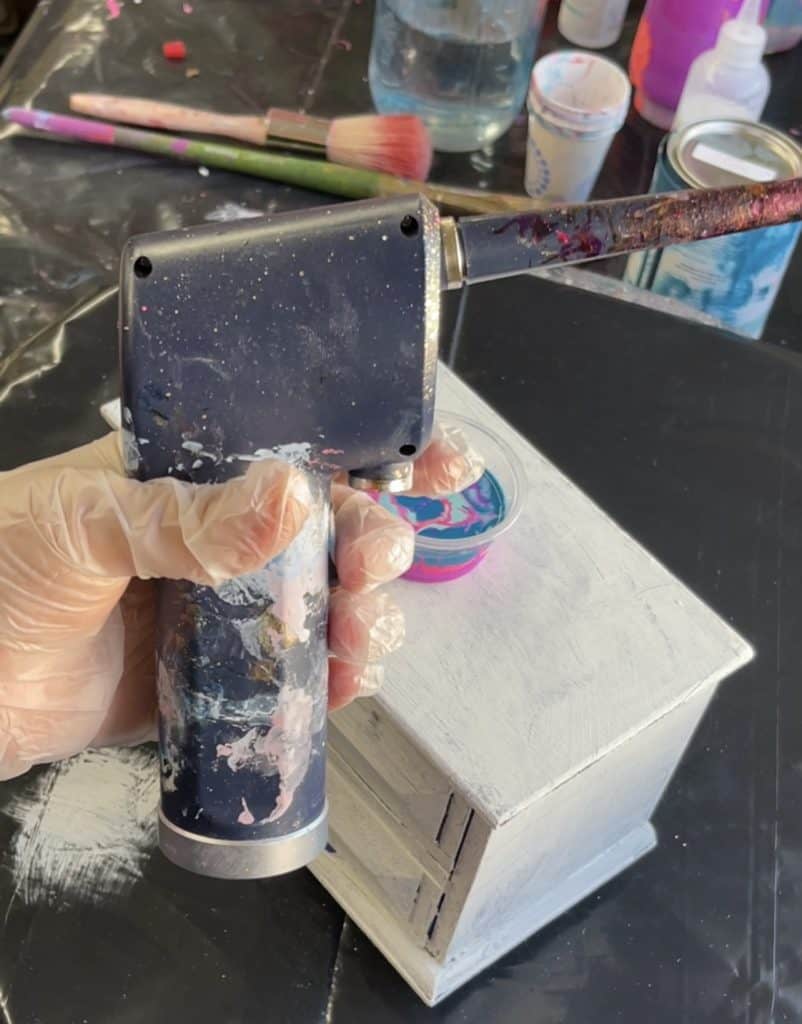
Pay close attention to how your colors are working together my friend. Do you love it? If not mix up another batch and pour right on top of this one.
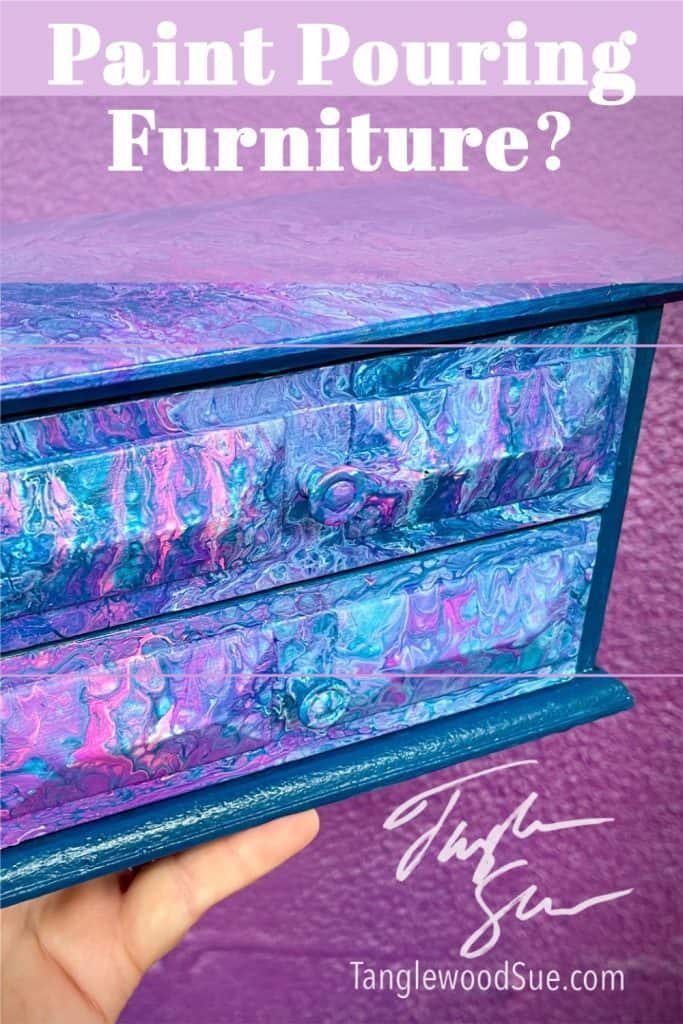
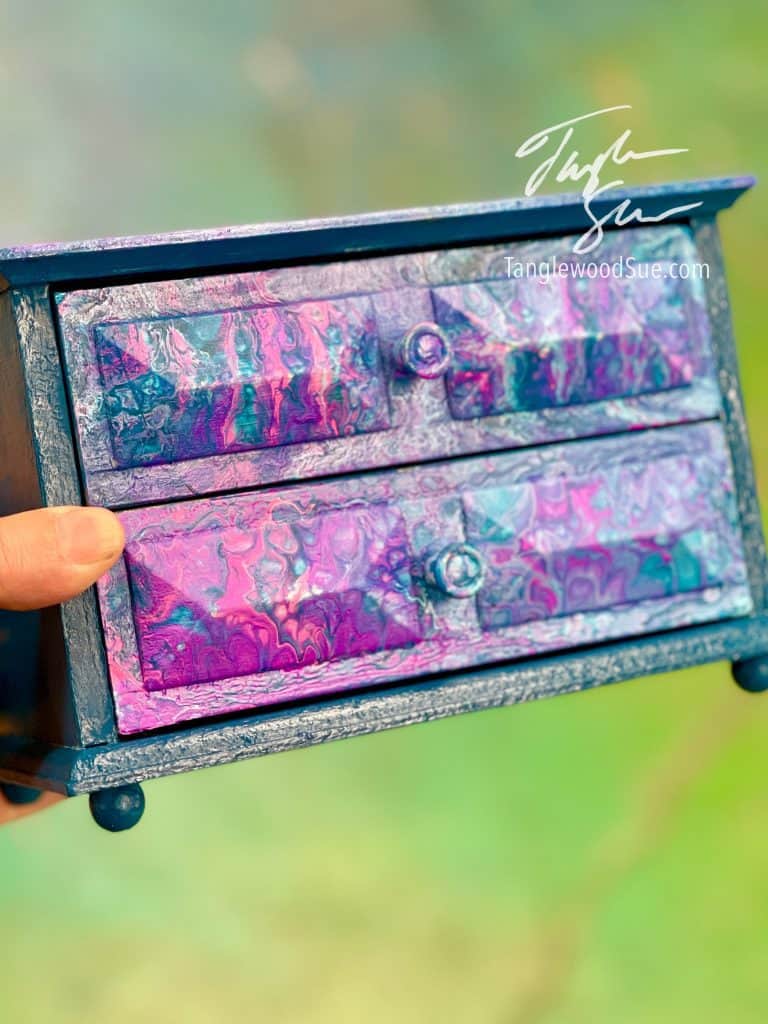
Once you get the mixture to your liking you are ready to test this on your next step. Although I want to do this on a dresser eventually, I took a baby step on this one and found a jewelry box that resembled a dresser. I wanted to test how much I would need to tape the drawers and to visualize what I would need to do to actually move the dresser around like I did the canvas.
Want to See The Entire Paint Pouring Process? Watch Here!
I made a lot of mistakes that will only help me on my dresser when the time comes.
Be sure to get on my email list so you will be notified as soon as that day comes.
Which Background Do you Like Best? Let Me Know In The Comments!
https://youtu.be/MJzRJ1GJEXY
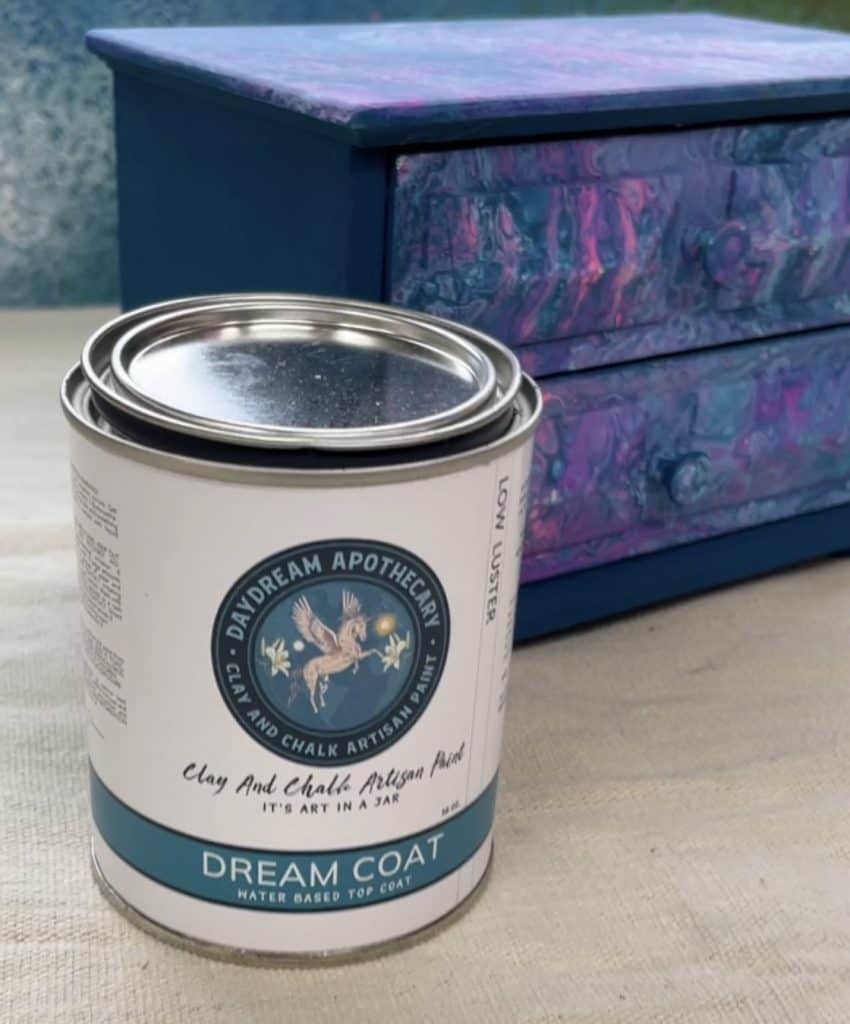
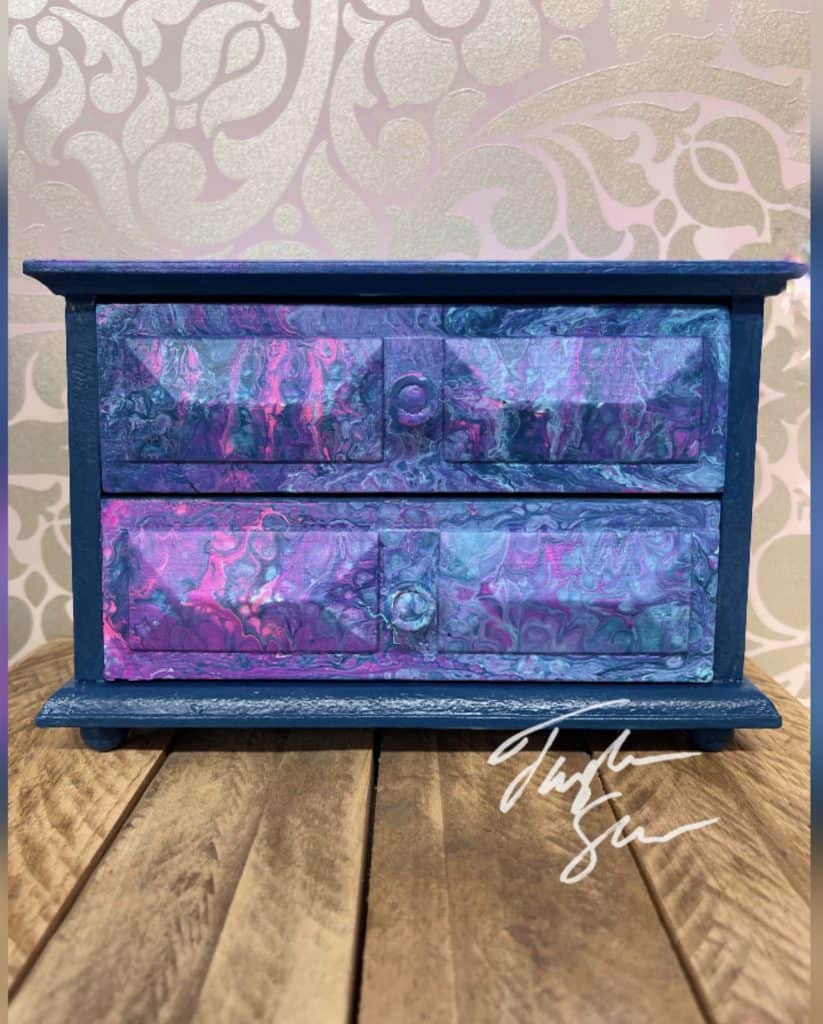
The Finished Pour Painted Daydream Apothecary Paint Jewelry Box:
Grab Your Daydream Supplies Right Here!
2 comments
I’m new to your page, a fellow painter turned me on to it and I’m in love, going to be an addict! Love it so much.
What kind of blower are
You using