
How to Decoupage Furniture with Fabric
In today's post, I want to give a general explanation of why I think decoupage is a great way to upcycle furniture, explain decoupage trends I don't care for, and why I think using fabric is such an exceptional decoupage technique.

I know I have a tendency to throw way too much information out about anything upcycling, so this post I've actually made you some chapters. Skip to what you want to know more about, and come back to the rest when you have time :)
Chapters: (cool right??)
Top 5 Reasons to decoupage with Fabric
Types of Paper You Can Decoupage With
Step by Step Guide to Decoupaging with Fabric
Link to Youtube Fabric Decoupage Tutorial
Before we discuss how to decoupage furniture with fabric, let's first discuss what decoupage is, shall we?
From dictionary.com we understand decoupage to be:
noun Also dé·cou·page [dey-koo-pahzh; French dey-koo-pazh] .
the art or technique of decorating something with cut-outs of paper, linoleum, plastic, or other flat material over which varnish or lacquer is applied.
work produced by the art or technique of decoupage.
Notice they don't mention fabric by name? By the time my Tanglewood Sue upcycling techniques have taken over the DIY world, dictionaries will all need to be updated. Don't you think?
Let's list the top 5 reasons I think Decoupage is awesome for Upcycling Furniture.
- You don't have to be an advanced artist to get art onto your furniture. Now I may argue with you when you say you can't paint a flower because anyone can paint a flower! Choose any youtube tutorial and within a day you can learn how to paint that damn flower, BUT, I do understand if you have a flower vision that exceeds your current flower paint abilities. This is the perfect case to be made for grabbing the mod podge.
- If sealed well, decoupage is pretty darn durable. I have decoupaged pieces that have held up for years and years.
- If you are going for a maximalist vibe with lots of colors, decoupage is actually less expensive than all those paints.
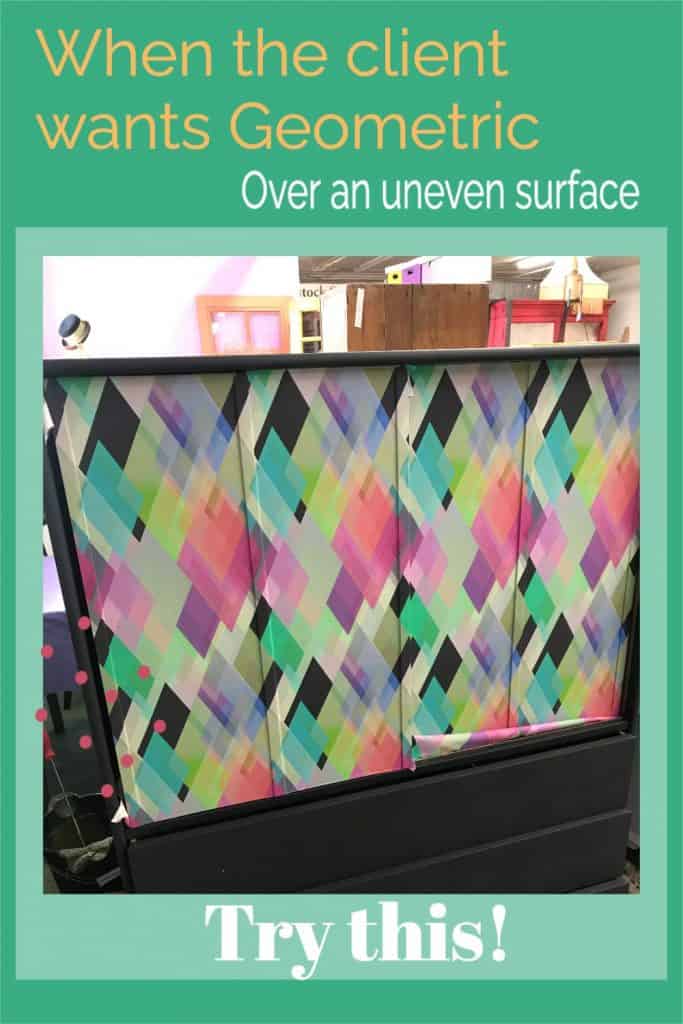
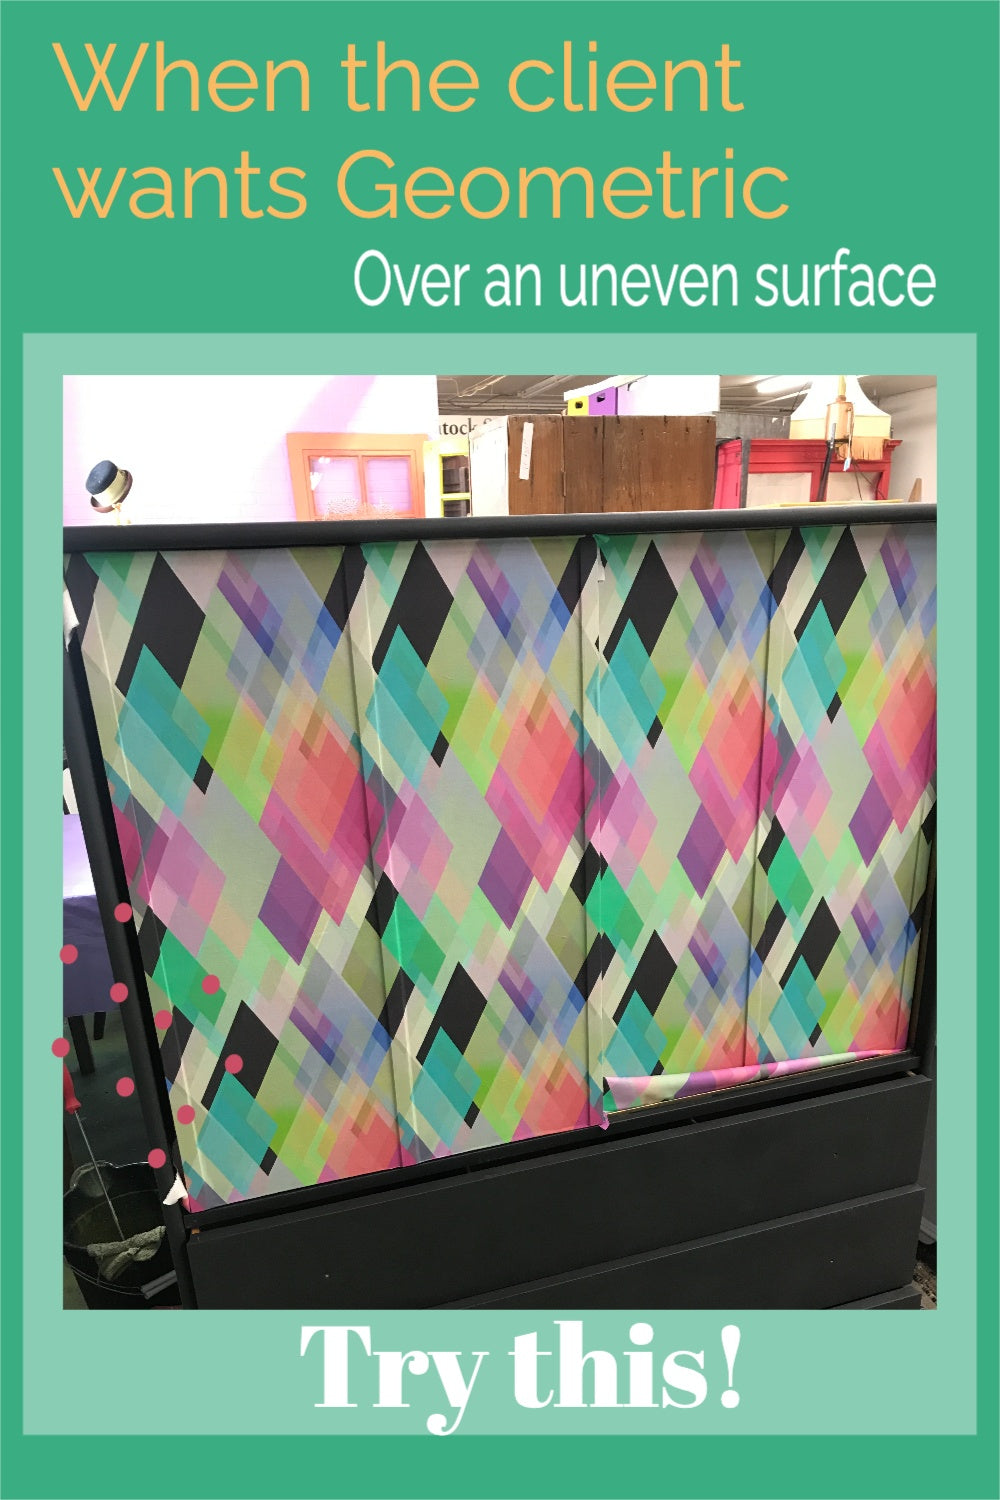
- If you are going for geometric patterns, decoupage will save you hours of painstaking measuring, leveling, and tape sealing. Whenever I have a client asking for an intricate geometric pattern, my suggestion is decoupaging a design of their choosing.
Now, most of you will associate decoupage with paper which is completely understandable. Paper is inexpensive and comes in so many varieties.
Here are just a few kinds of paper I have decoupaged with (to see my full colection click HERE):
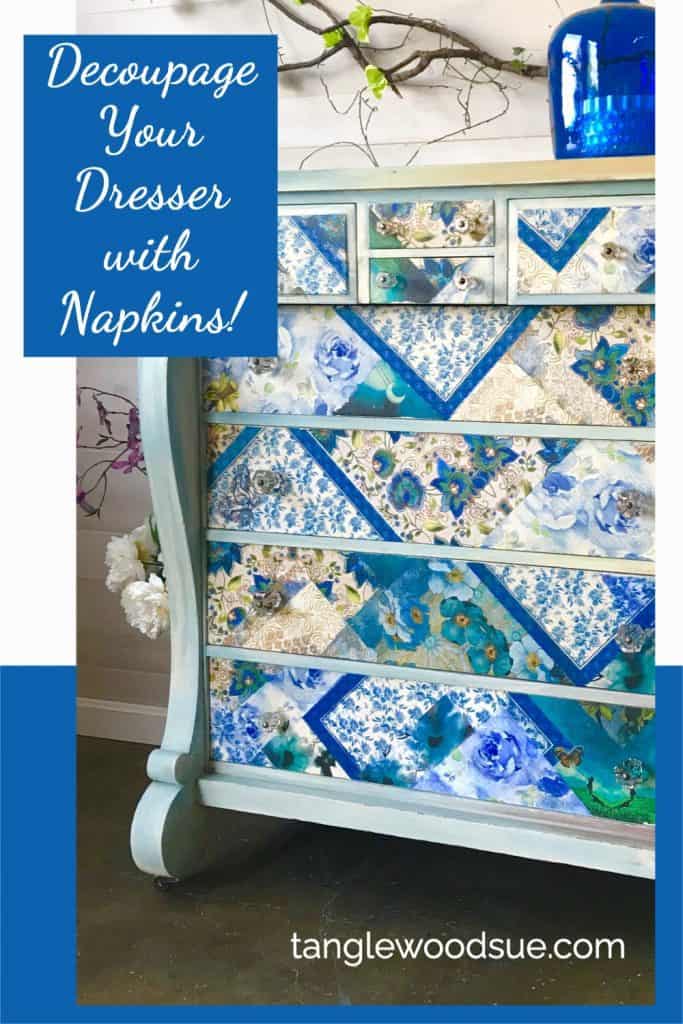
1.Napkins (see how to avoid wrinkles here n my most favorite Youtube video)
2. Wrapping paper (do a topcoat test to avoid ink bleeding)
3. Printed designs of my own. (I made this fabric using a painting by my Daughter Sadie :)

4. Scrapbooking paper (tons of choices but can sometimes be too thick for a smooth bond)

5. Rice paper (strong and thin= great decoupage choice)
6. Wallpaper! (Save your scraps or even ask a local Interior Designer for theirs)

As promised, here is my content where I'm at risk of being canceled since I have some strongly held beliefs about decoupage trends that I'm just not that into.
- Decoupaging a popular and easily recognizable design: Now I completely get that not EVERONE'S IG feed is all painted furniture like mine, and that means most people won't even recognize an overly saturated design that is all over everyone's furniture this year. I don't mean to be such a B. but I truly believe in expressing your individual creativity AND I want you to reinvent your furniture in a unique way that expresses your individuality.
- Using a single design that does not fit the front of your piece of furniture: If you really want to use another artist's full image on the front of your piece at least make sure it fits the piece. I prefer to see the image have a full bleed to the edge of the wood. I do see some amazing blending techniques camouflaging blank spaces around images but, I don't dig it. Sorry-not sorry. This is not my work here but its a clear example of what I mean. Both techniques are well done. I just find the full bleed to be much more visually pleasing.
- Using design scales that are too small for your furniture: If you have a large furniture piece, I prefer the scale of the design to be larger. Think of it like you would choosing wallpaper. You probably won't wallpaper a large room with tiny little flowers. You would choose a design that suits the scale of your room. The same goes for furniture. I'm ok with the reverse. A big-scale design on a small piece is a cool statement.
These are more decoupage errors I find all the time
- Leaving bubbles on the surface of your decoupage: If it's not smooth, it's not adhered properly and the paper will certainly keep pulling away from the surface over time.
- Not cleaning up the decoupaged edges of your furniture makeover: Just because you got it to stick does not mean you are done. I can't tell you how many people brought me sloppy decoupaged pieces to try and sell at my shop.
Am I canceled yet???
Well, this post is about using fabric decoupage so let's get into it.
Why I Love Using Fabric?
- Endless patterns and designs: I mean the possibilities are absolutely insane. There are so many colors and styles to choose from. The reall issue will be narrowing it down.
- Fabric is universal. I mentioned above how many kinds of paper there are, and even in those papers, there will be a lot of differentiation. A cotton weave is usually pretty standard. Even if the print quality varies, basic cotton is usually the same thickness.
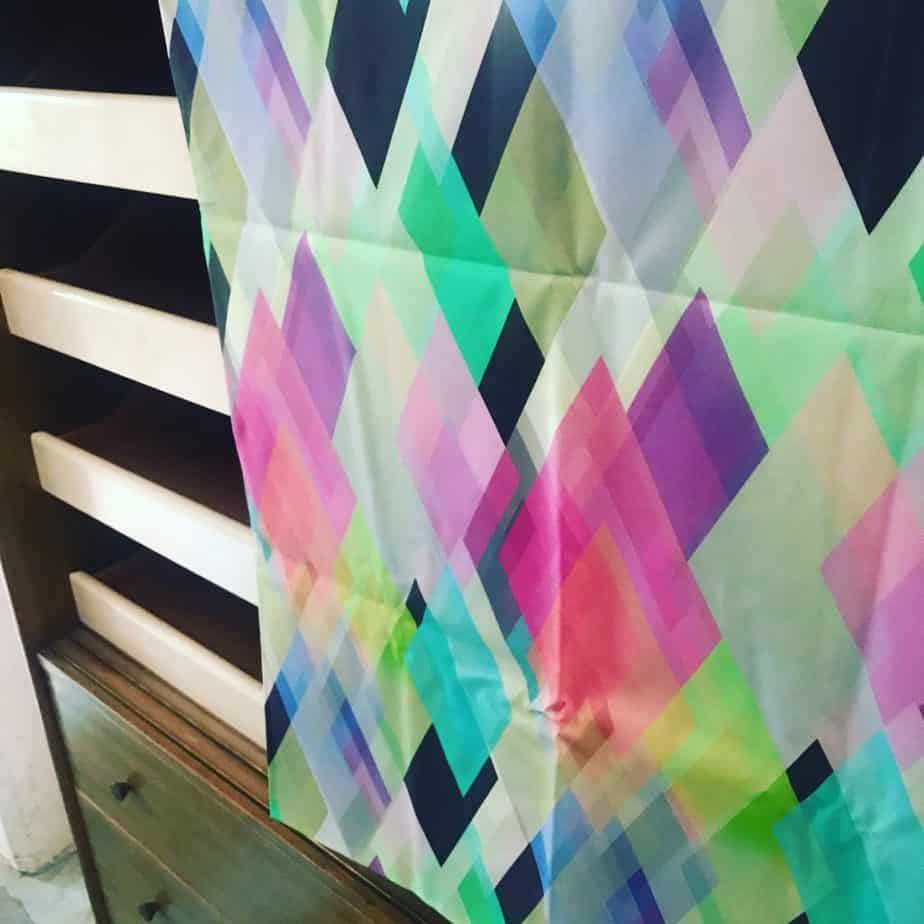
- Fabric will not tear or bubble. It may stretch a little bit which you need to be wary of in your design, but it can handle a little roughhousing.
- Once dried and coated I find fabric to be so much tougher than paper. Think about it. Would you rather go to the ball in a dress made of fabric or paper???
- Fabric can hide so many blemishes. It's like that perfect concealer.
- Fabric is not limited by standard paper sizes This means you can get huge designs and patterns that can completely cover your furniture, even around corners! For certain really messy finishes, fabric is just so much easier. I really wanted to do a paint pour on furniture but I could not fathom how much mess that would be on a dresser. I actually found a fabric print of a paint pour! I mean COME ON! How fantastic is this and with no mess?!!

So How do even begin this process you ask?
As with all of my tutorials you can read them or watch them. I originally made this tutorial for Jennifer Allwood's painting tutorial series as one of her featured artists. After rewatching this it totally stands the test of time. I wouldn't change a thing. Check it out for yourself
My In-Depth Video Tutorial for Fabric Decoupage
- The first step is to measure your furniture so you know how much fabric to buy. This will also help you if you want to choose a larger pattern that will not repeat. If this is your first entry into decoupage, let's make this a little easier on yourself so choose a dresser or armoire with a flat or slightly curved surface. We don't need to crazy with a bunch of carved elements. We can tackle that once we nail this first.
- Now we can "skip to the good part"-choosing the fabric! I personally prefer a basic cotton blend. It has enough "give" to help you place the fabric but not so much as to lose its design on your piece. Head to the fabric store or if you really want to go crazy, check out spoonflower.com. I could do a whole post just on this website.

- Not only can you find any and all designs, but you can also upload your own designs and make your own fabric. Is your mind totally blown yet? Years ago, I had a client who wanted a piece that included her son's lacrosse press clippings somehow displayed on a hope chest she was giving him. I came up with the idea to scan the clippings and make a fabric just for her and I decoupaged it onto her chest. Her Hope chest I mean. I'm still pretty proud of that one I have to say. I'll see if I can find that tutorial for you...

- Prep your furniture piece just like you would if you were painting it. I know, it would be nice to skip this boring part, but trust me. You want everything to stick-not be sticky. though Here's a video that might help you:
- Paint a basecoat. Even though I don't promote priming furniture in most cases (see full prep tutorial here), you will want to paint a base color to enhance your decoupage. If you use white it will make everything brighter of course, but choosing black or anyther jeweltone can really shift the mood of your piece in dramatic ways enhancing your fabric choice even more.

- Assuming we now have fabric and a suitable piece of furniture, it's time to start visualizing the placement. In my video, I could have paced the agate pattern in a lot of different ways. Just grab some tape, stick it in place and step back. DO you like it? Ok cool. we are done here. Ha! not so fast.
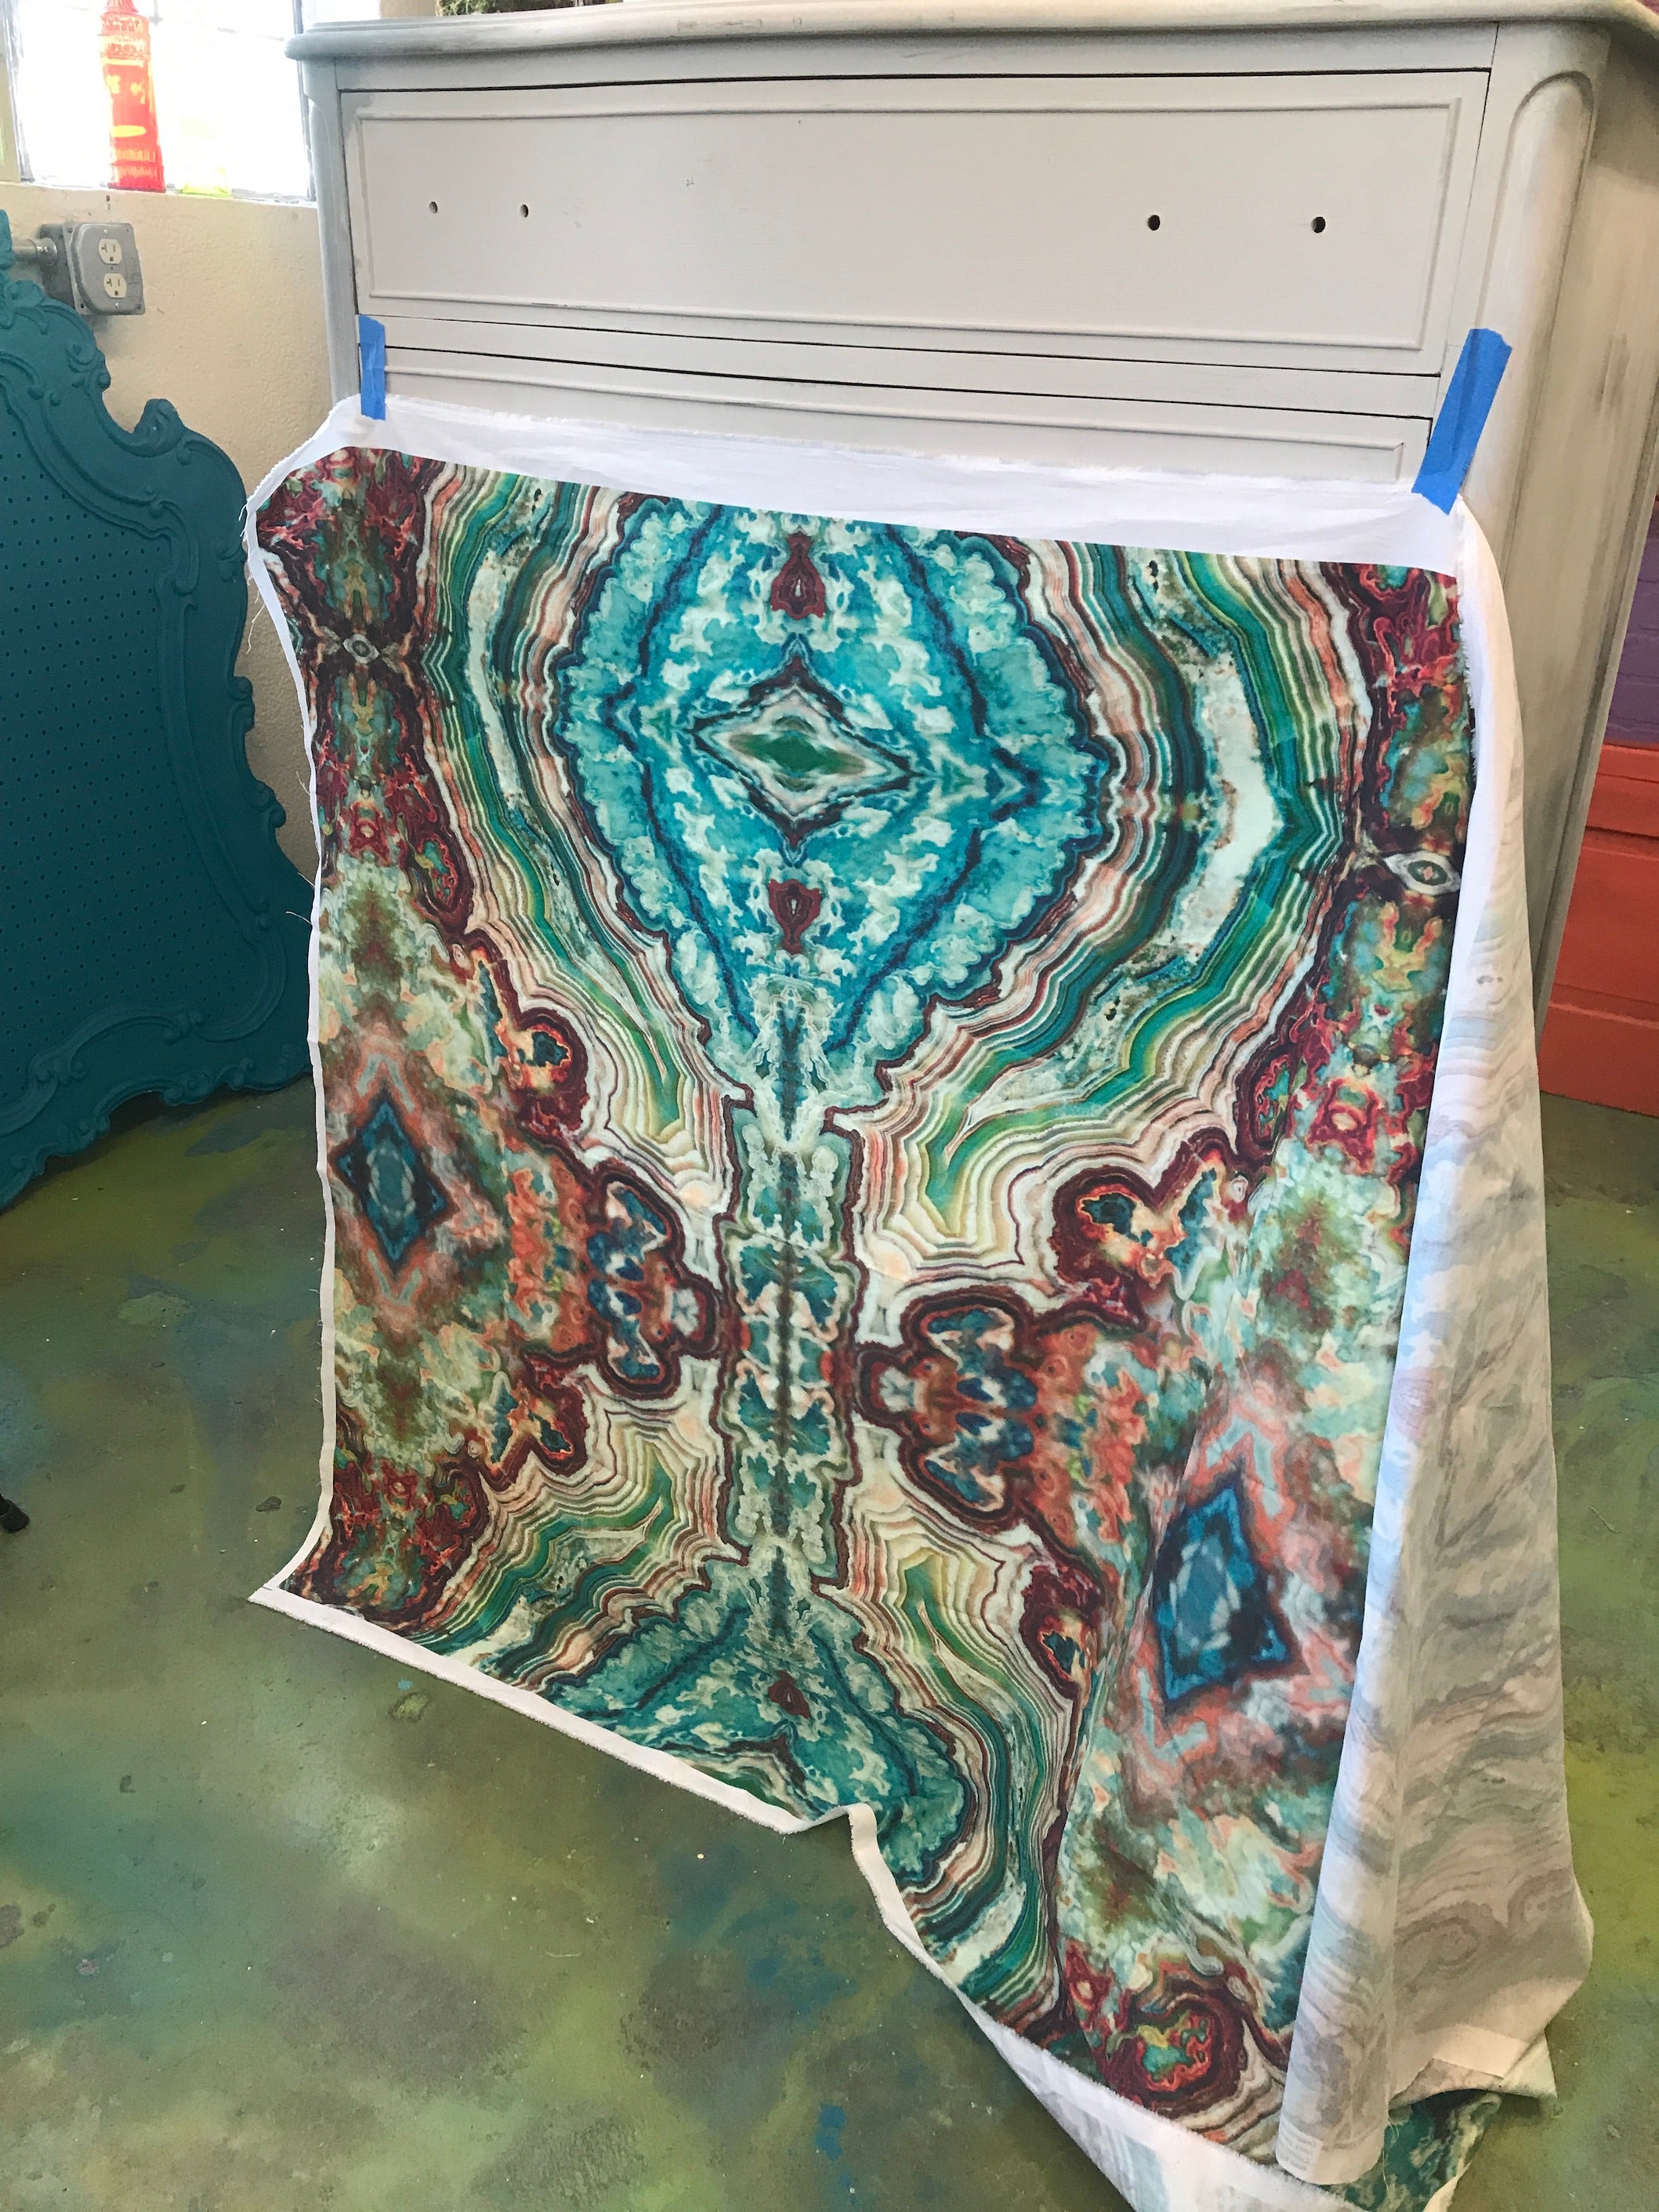
- Once you have a basic placement idea go ahead and cut off any excess fabric. I know this can be scary but as long as you leave a few inches around all sides you will have enough. Too much excess will just get in your way. Leave it one sold piece even if you have drawers. I have a trick for this.
- Now grab your photo mount spray. This is really gonna help you get this design on just right. Medium tack will allow you to reposition if you don't get it just right the first time.
- after a few minutes, the glue will be tacky enough to place your fabric right onto your piece. I personally make sure my top left and right corners match, press them down, and then spread out the rest with either my palm or a paint spreader. It may take a few tries but if it's not right you can lift and re-align and there is no risk of it tearing or getting ruined!
Are you getting tired? Hang in there. It's gonna be so worth it!
- Use a brayer or even a credit card and really make sure you get all the bubbles out and you have super strong adhesion.
- For this next step, you can grab everyone's favorite art and craft supply, her royal highness, Ms. Mod Podge herself! Pour some out and get a really stiff brush and start painting over the fabric. because it's cotton you want to podge to go through the fabric and totally adhere your fabric to your wood.
- Now let this dry till it's hard. A few hours At least, and then do it again. And again. And again. Basically, you are building up the layers so that your fabric becomes a part of your furniture.
- Let all of the dry overnight and then you can use a razor to cut away the excess fabric around the drawers and you can also now cut the fabric between the drawers. This is so much easier to do with a litle Mod Podge stiffening the fabric. Don't worry about frayed edges. grab a sanding block and just sand towards the wood and it will smooth out all the edges.
- The last step is to apply your top coat of choice. Modpodge is great but I still want a protective layer over it all. I have used acrylic water-based sealers and even wax.

I personally like to finish painting any edges or sides now. If I do this first, the colors may not look the same as the newly decoupaged piece. I grab a variety of colors that will complement my piece but hopefully not compete with the beautiful design.
Remember that these colors are backup singers. Don't let them too close to the mic :)
Hope this inspires you to decoupage with fabric, my friends!
Sincerely,
Tanglewood Sue
Here are all the supplies I sell that will help you on this Decoupage Furniture Makeover
Note-I no longer sell the paints used in the video But I have chosen the closest colors from Miss Lillian's No Wax Chock Paint. See all the colors I carry right HERE
/*
*/

7 comments
Hi there, I am very interested in doing decoupage witH ‘FABRIC’ In the past I have done a considerable amount of decoupage with napkins on all sorts of things, shells, pictures, small stool, pods from a Nikau palm (NZ) native tree. Many things. I am now looking at purchasing various small furnishing pieces from our local Den store, such as small tables, little cabinets etc. Your blurb above is very informative and I Note many of your instructions. Looking forward to my next project. Will keep you informed! Many thanks. Cheers from New Zealand, Jane x
Hi there, this weekend is fastidious in support of me, because this occasion i am reading this impressive informative post here at my house.
I’m just starting my first project “Decouple” ( I have lots of experience , sanding /painting/repairing projects)
I’m supper excited and nervous to try this .. wish me luck !!
I love everything you do the colors everything…Iam about to paint a canvas chair in a cream for the body but a red mattress ticking fabric with matching foot stool..HELP expensive chair by Broyhill I would like it cherry red or fushia.. should use. Iam confused about which technical paint to use
your tutorial on fabric decoupage was so cool. I have done it before but you inspired me to take it up again. thanks for taking the time to share